Components
Assembly
360 Control
HardWare Setup – Note this product is no longer available.
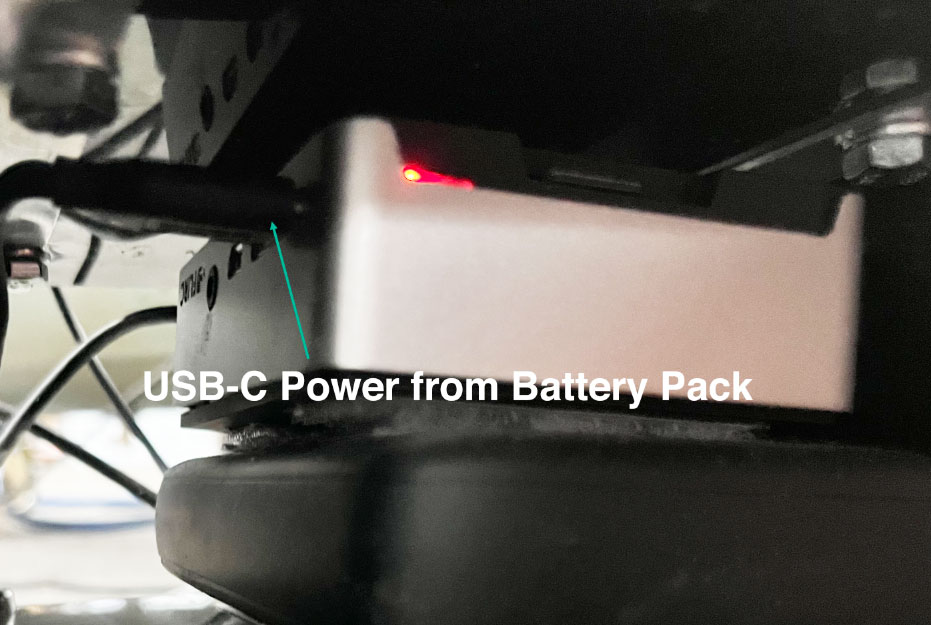
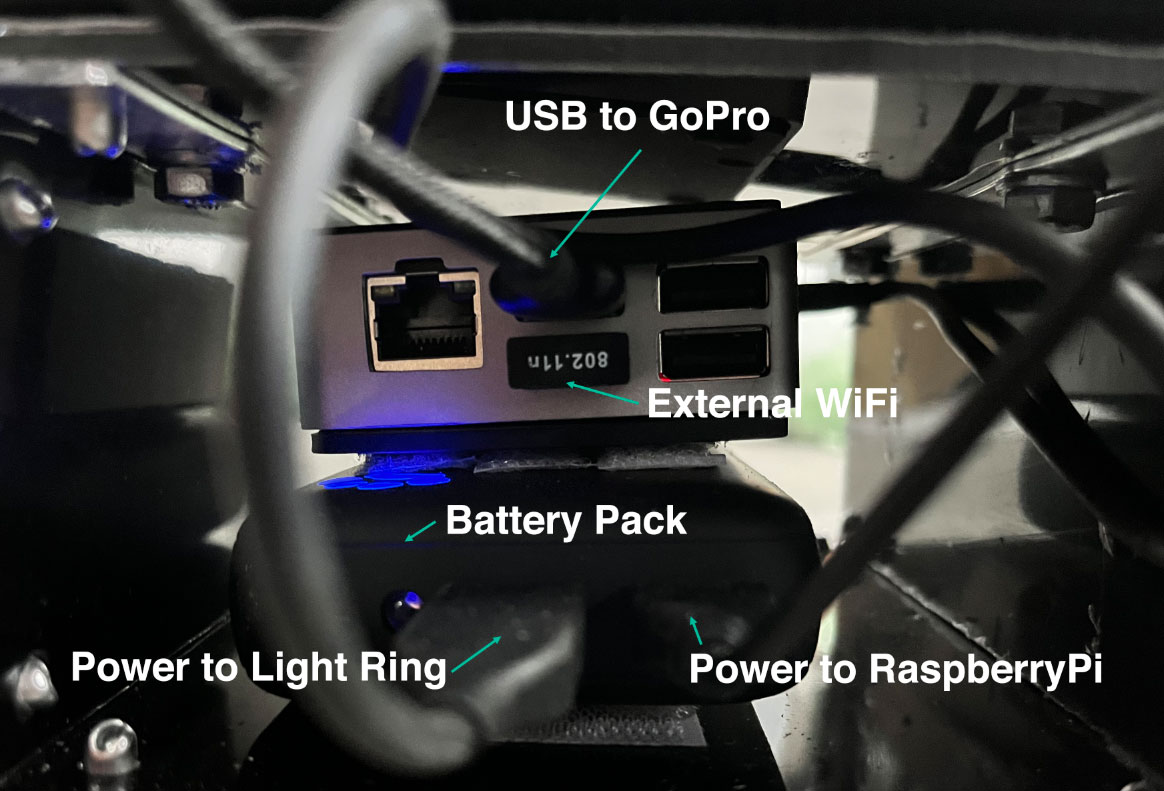
1. First thing to Connect is the Power to the Raspberry Pi from the Battery Pack. Wait 5 minutes for the system to fully boot up.
Note: It’s important to wait at least 5 minutes to allow the system to fully boot up.
2. Turn on the GoPro Camera.
Note: Make sure no USB’s are connected to the GoPro when turning on.
When fully on (takes about 30 seconds) plug the USB-C into the GoPro and the other end into the Raspberry Pi. Check that the GoPro Camera shows a Connected to USB on the Display.
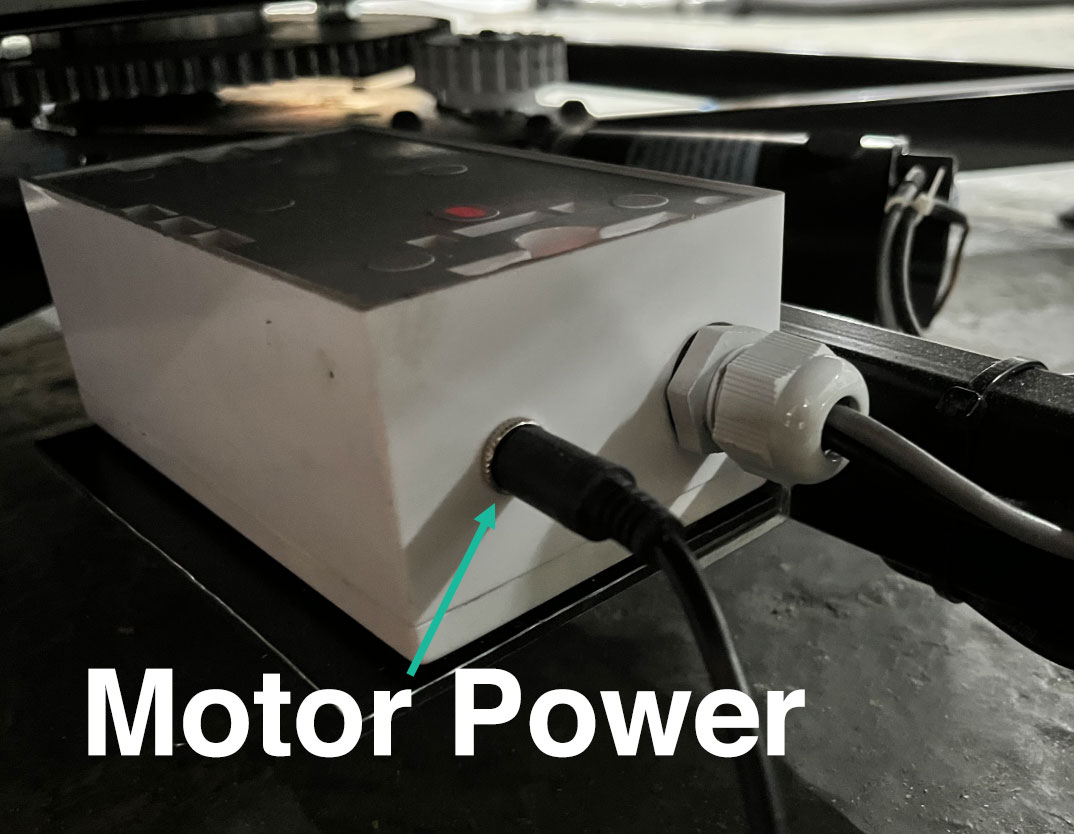
3. Connect the Power to the Motor Controller Connection.
4. Turn on Tablet and Connect to the piBot Wifi Connection.
5. Navigate to http://192.168.4.1 in Chrome Browser.
6. When the page loads the top left icons should all show a Green Connected Icon, if it’s Red double check connections for the GoPro (bottom icon), and the Motor Controller (turning off an back on then reload the web page on the tablet).
If the Wifi is not showing as connected Setup the WiFi Connection (see below Choose Wifi section) then reload the main Web page to check the Connected icons.
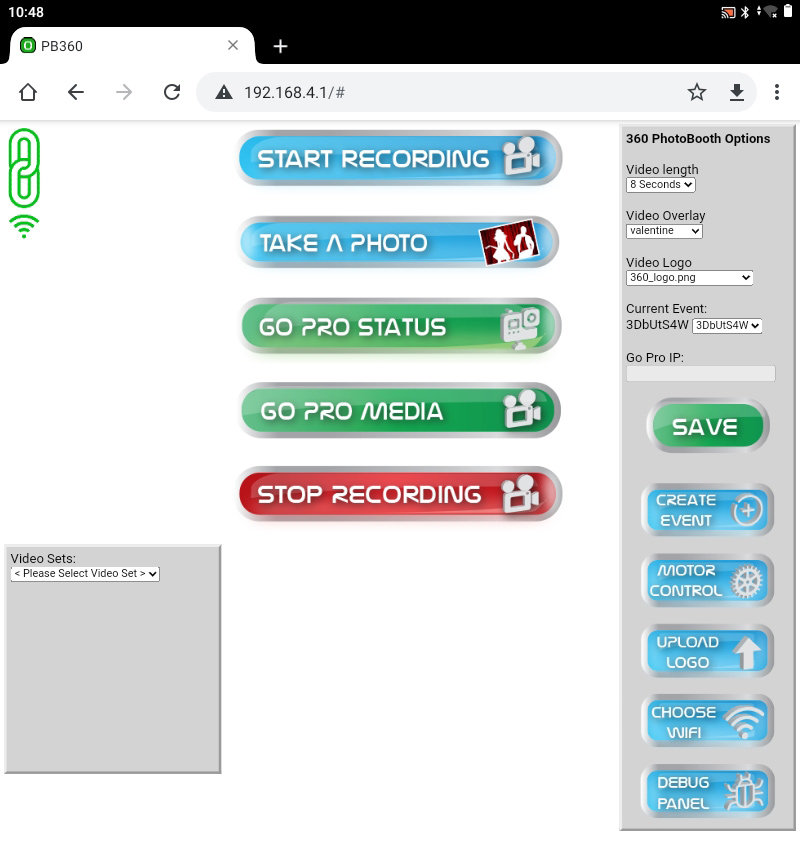
Usage Interface on Tablet.
Tablet – Make sure everything is switched on, booted up and conected.
Then on thte tablet connect the Wifi to the piBot Wifi connection. After connected open a browser and navigate to:
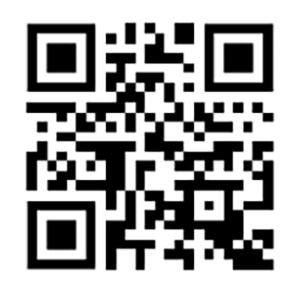
http://192.168.4.1/
Or Scan this QR Code:
Connection Icons
The top left of the page shows the connection icons, the top icon link shows connection to the 360 Drive Mechanism, if this is Red it is not connected so unplug the Drive Mechanism and Re-plug in (this will reboot the drive mechaism). Then Reload the web page.
The second WiFi icon shows if the System is Connected to the internet (this can take a couple of seconds to check and will initially show Red).
If this is Red then go to the Choose WiFi section below to connect the system to a WiFi Connection.
A third icon for the GoPro may be present, if this is Green the GoPro can be detected and is working (also the GoPro will show a Connected via USB on the screen), if this icon is Red check the GoPro leads and battery levels.

Event Options
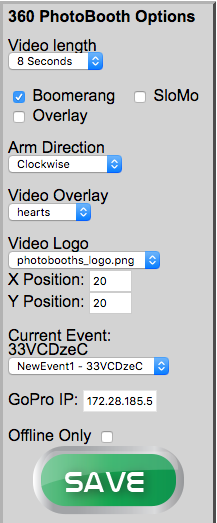
Seting up your Event Options is done through the top right panel.
The Video length can be selected as 8 seconds or 5 seconds.
Video Overlay options can be selected to suit and the Video logo if required can also be selected. If you require your own logo you can Upload one through the Upload Logo option detailed below.
If you wish to go to a previous Event you can select the event ID and Click Save.
Go Pro IP address is just a note for us to use on support and can be ignored.
Offline Only won’t upload anything and only use the localised network for delivering the Videos to customers (this requires an external AccessPoint/Repeater).
Create Event
For each event you do you would click Create Event to group all the video’s created into one section (this is not necessary, but for a house keeping purpose is useful for viewing video files for each Event).

Upload Logo
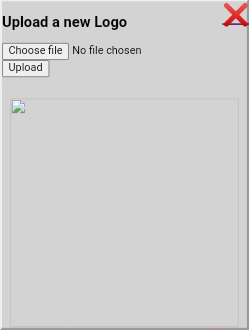
To change the overlay logo click this icon and it will bring up the Upload Logo Panel.
Then select the Choose File and Select the Logo.
If you have your logo on a PC the best thing to do is to connect to the piBot Wifi on the PC then in a browser navigate to:
http://192.168.4.1/
Then you can choose the logo on the PC to Upload it.
Logos on the videos are positioned in the top left corner, and we would suggest a logo size of around 500 × 128 pixels.
If the logo is accepted it will appear below the choose options as a preview.
Logo should be a transparent PNG file for best results.
Note: Logo filenames should be normal alphabetical characters with no spaces.

Choose WiFi
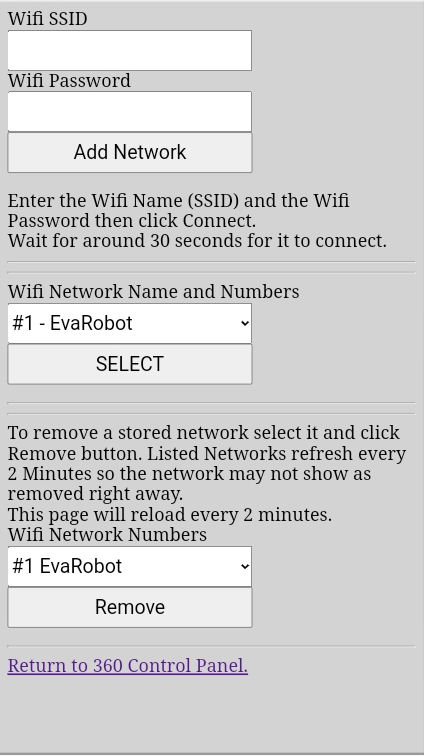
In order to upload the Videos taken by the 360 Booth you will need to connect the system to a WiFi at the Event you are at.
Clicking the Choose Wifi Button and it take you to a new page (tab) to add the Wifi, Select the Wifi and Remove Wifi.
First thing to do is in the Top two Text boxes is add in the Name of the Wifi you wish to connect to and enter the Password. Then Click Add network.
You will need to wait for a couple of minutes for this network to be added. It should usually connect automatically to the network after a few minutes.
Wait for a minute or two and return back to the main page (http://192.168.4.1) which in the browser should still be open in another tab and refresh the page. If the Wifi Connection shows then your all done.
If this is not the case make sure at least 2 minutes has passed and refresh the Wifi Page to get all the settings afresh.
In the Second option Wifi network Name and Numebrs see if it lists the Wifi You entered (if not give it another minute and reload the page) choose it and press the Select option.
Repeat the process until the WiFi connection shows as connected.
NOTE: The system connects to a Wifi with a SSID and Password, it is not able to connect to Wifi connections that require you to log in (eg public access Wifi and Hotel Guest Wifi).

Video Sets Panel
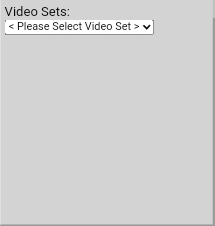
You can select Video Sets for the current event by clicking on the Drop Down Selector.
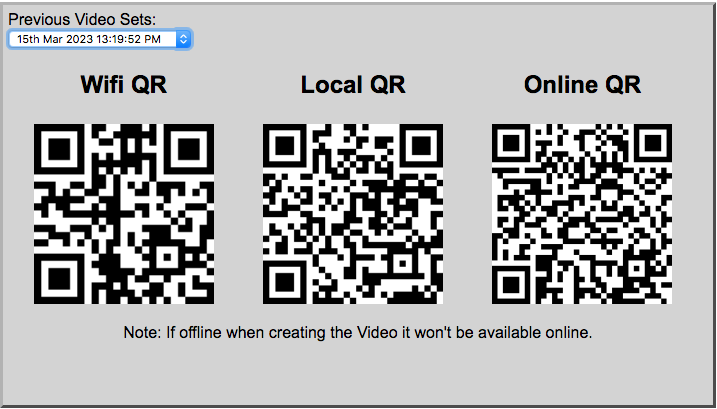
After selecting a video it will show a QR Code to Connect locally to the system (setup someone’s phone on the Wifi), then the middle QR Code will show a link to the local file (so customers can download the video/view the video).
And finally a Online Version QR Code (if Offline Only is de-selected).
For Events an External Router is advisable for allowing multiple connections to the local system (See Admin for creating Wifi QR Code).
Listed Videos are time stamped.
Admin Panel
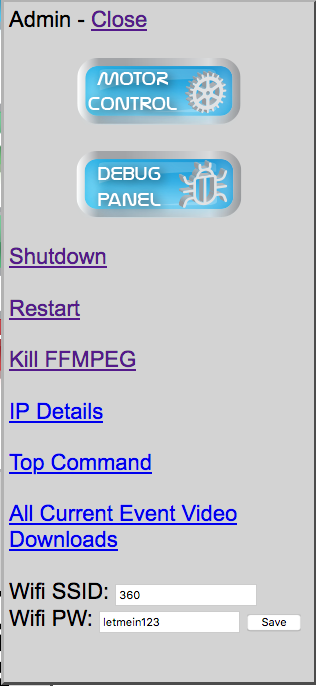
Most of this is for access by ourselves for administration purposes with the except of Shutdown, Restart and WifiSSID, however a few items may be of interest and it’s worth familiarising yourself with the options in case you need to call support.
Motor Control – Clicking the Motor Control icon will bring up a panel for controlling the Drive Mechanism of the 360 Booth. This is also available on the IP address 192.168.4.25
Debug Panel – Used by support this can be ignored
Shutdown – Correctly shuts down the system
Restart – Correctly restarts the system
Kill FFMPEG – The underlying system that processes the videos can be killed if for example a raspberry pi or motor control has failed during operation.
IP Details – Shows a Page of all IP Addresses connected to the system (Motor Controller, GoPro and any network devices)
Top Command – Shows a single print of all processes currently running on the 360.
All Current Event Video Downloads – Shows page of the current events Videos to view and an option to create a zip file of them all and then download. It’s recommended to connect to the system with a desktop PC (connet to the wifi) before doing this to allow you to download the zip file correctly.
Wifi SSID and Wifi PW – This is what sets the QR code to scan to connect to the Wifi.
All Videos Access for client – For Client Use
The URL that is sent (via QR Code) to the client when they scan an uploaded video can be broken down to view all the videos for that event.
And Example URL May be:
https://socialsharestation.com/360/share/?3auTfBDT-20220108104910
If you strip out the share/ part and take off the last numbers including the hyphen ( -20220108104910 )you would have:
https://socialsharestation.com/360/?3auTfBDT
That link will present all the videos for the event to the client.

All Current Event Video Download Page (or Admin Use)
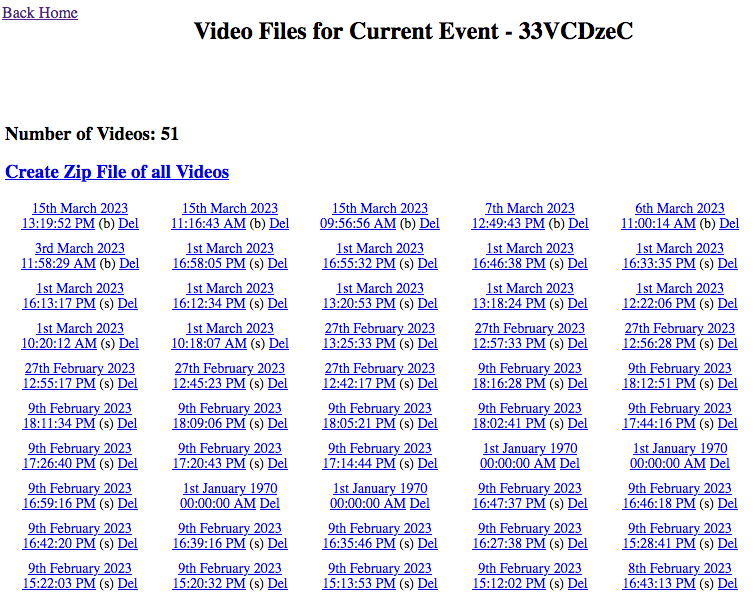
This page shows a list of all the videos for the Current event with the option to ‘Create Zip File of all Videos’.
When clicked it will put all the vidoes into a zip file and refresh the page. Wait until the dialogue box has gone after clicking this, it will refresh the page with a link to the zip file at the top.
Note: This can take quite some time. And it is advisable to delete the zip file after it has been downloaded.
The easiest way to get the videos off the device is to connect a Desktop PC to the piBot Wifi.
Then navigate in a browser on the PC to
192.168.4.1
Click on the ‘Admin’ button bottom right of the page then click on the ‘All Current Videos’ link.
From there you can click the ‘Create Zip File of all Videos’, wait for it to complete (it will take a while depending on how many videos are in the event). Then a zip file will appear upon the page reloading at the top. This can be downloaded to the PC.
Start Recording
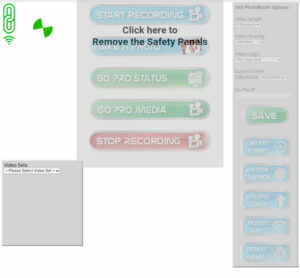
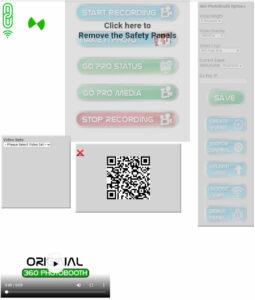
After everything is setup, you have chosen the event options (length, video overlay, logo overlay) and the Motor Connection and Wifi are showing as connected you can click the Start Recording to start the 360 rotation and the Go Pro starts to record.
Whilst this is happening some overlay panels will block out the options on the screen for safety (you don’t want to be altering settings whilst it’s recording). To remove the safety panels click the central panel.

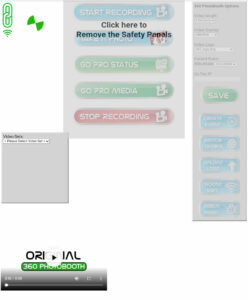
Wait until the 360 PhotoBooth has stopped spinning then it will process the vides in order, Original, Slow Motion then overlay video.
After each one is processed it will then upload the videos to the cloud at which point a QR Code will be shown on the screen. This shows that at least one of the videos has been uploaded.
Note: Upload times vary depending on internet connection.
Optional External Access Point/Extender
If you have an optional access point (AP) for wifi broadcast at an event you can access the AP with the Asus Device Discovery App which is available here:
Email support for the Asus AP admin access.
After changing the Asus AP’s Wifi name it will need to be changed in the Admin Wifi SSID and Wifi PW section.
Setting Up GoPro after a SD Card or GoPro Camera Swap
Insert sd card into raspberry pi computer then set up all electricals as normal as if doing an event.
Once that is done go onto the 360booth app as normal
As it is a new sd card you will need to pair the gopro camera to the software and also enter the name and password for the external Asus router in to the 360booth app. You will notice the camera icon in top left hand side will be showing as red and not green this is because of go pro not yet being paired.
To pair the camera and also set up the asus router please follow these extra steps.
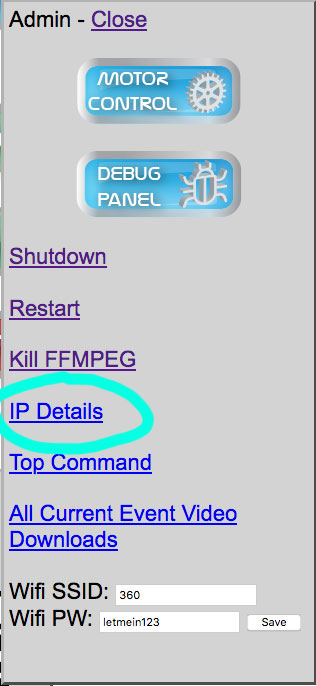
First you need to click on the Admin Button option on the lower right hand side of the screen.
Once clicking Admin you will see the following screen you then need to insert your router name into the Wifi SSID text box and also the password. The password is letmein123 your routers wifi ssid is spin360ty
Once you have entred those just click save underneath and wait til it refreshes.
Next you want to click on ip details
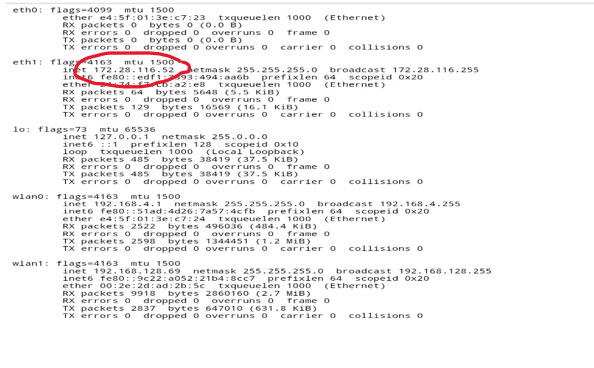
After clicking the ip details you will see the following tab where you need to copy the GoPro camera IP address so look for the IP that ends in 52 normally the second row down as circled.
For example this go pro ip address is 172.28.116.52
Make a note of those numbers including the dots.
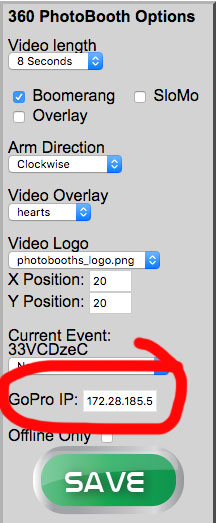
Next you need to close that tab then on the main 360 app on the right hand side you will see a box that says go pro ip with numbers and dots already in there. So you need to replace those with the ip address you just noted down but before clicking save you need to change the last 2 digits from 52 to 51 then click save. You are all good to go then and the camera icon will turn from red to green.
Video Overlay Files
Video files have full background transparency (this will show as a black background when viewed on a normal PC).
These files are quite large when created (usually well over 45MB).
One Overlay needs to comprise of 4 files, 5 seconds, 8 seconds, 10 seconds and 12 seconds in length.
They need to be named accordingly, so for a set that is, for example, called fireball, the file names would need to be:
fireball_5s.mov
fireball_8s.mov
fireball_10s.mov
fireball_12s.mov
Files are uploaded individually.
Note: If all files are not present it can cause issues when selecting different recording times.
Video File Details:
Format: .mov
Width: 1280
Height: 720
Frame Rate: 25
Decoded Format: 32 Bits RGB


 Been in or around engineering/manufacturing my entire life, grandparents who let you build cars with them have their uses!!
 After spending 4 years in Leicester studying physics where my final dissertation project was heavily programming based I was keen to begin a career in software development. Working on Photobooths seemed like a fun and interesting place to start.
 Born in Malta in January 1989, Maurizio has always dreamt of doing something impossible in his life. That’s exactly what he has done a few years ago when he decided to leave everything and moved to the West Midlands. His Passion was also another reason why he has chosen the West Midlands – West Bromwich Albion. Worked in different industries, like tourism, advertising, construction and entertainment, finance was always something that he wanted to do. Asking who Maurizio is to his friends, you would have one simple answer, – Joker, A Caring Person and a Plane Spotter.
 From College went into the family run business – Advertising Agency. Eventually took over the reins of the company and moved it into a more technical direction. After retirements changed the dynamic of the company we changed direction to a Direct Mailing Company specialising in digital and mailing’s for Electricity companies (MEB, British Gas, nPower). After a profitable run I felt a change was needed and so started a Programming and Consultancy Business. This eventually led me to the world of PhotoBooths and beyond.